In Datatruck, inspections can vary based on your fleet's needs, whether it's for a truck or trailer. The platform allows you to create and customize inspection forms that drivers can use during their checks. Follow the steps below to create a new inspection form.
Step 1: Go to the Inspection Section
From the main menu on the left, click on Fleet Management.
Then select Inspection from the dropdown.
Step 2: Create a New Inspection Form
Inside the Inspection section, navigate to the Form tab.
Click on the Create New Inspection Form button.

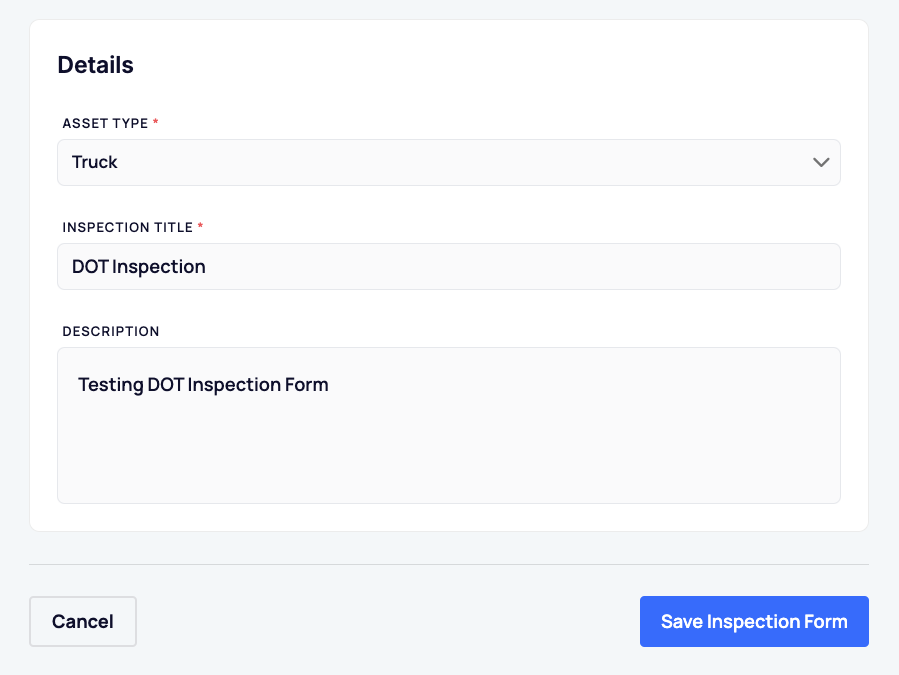
Step 3: Fill Out Inspection Details
In the form that appears, enter the required information:
Asset Type: Choose either Truck or Trailer.
Inspection Title: Provide a clear and relevant name.
Description: Add a brief description of what this inspection covers.
Once completed, click Save Inspection Form.
Step 4: Customize the Form
After saving, a new screen will open where you can modify the inspection form.
Add inspection fields based on what you want the driver to check.
- Once done, hit Save Inspection Form.
Step 5: Share the Form with the Driver
Click the three-dot menu next to the inspection form.
Select "Share Link" from the option.
Copy the generated link.
Send the link to the driver via your preferred communication method.
Once the driver fills and submits the form, it will appear in the Inspection List for tracking and review.
We hope this article was helpful. However, if you have any further questions, please don't hesitate to reach out to our Live Support.
Comments
0 comments
Please sign in to leave a comment.