Fuel cards in Datatruck can be assigned to either a driver or a truck. You can also set them to charge the driver directly for any fuel transactions. This ensures all fuel-related expenses are accurately tracked and reflected in driver statements.
Where to Start
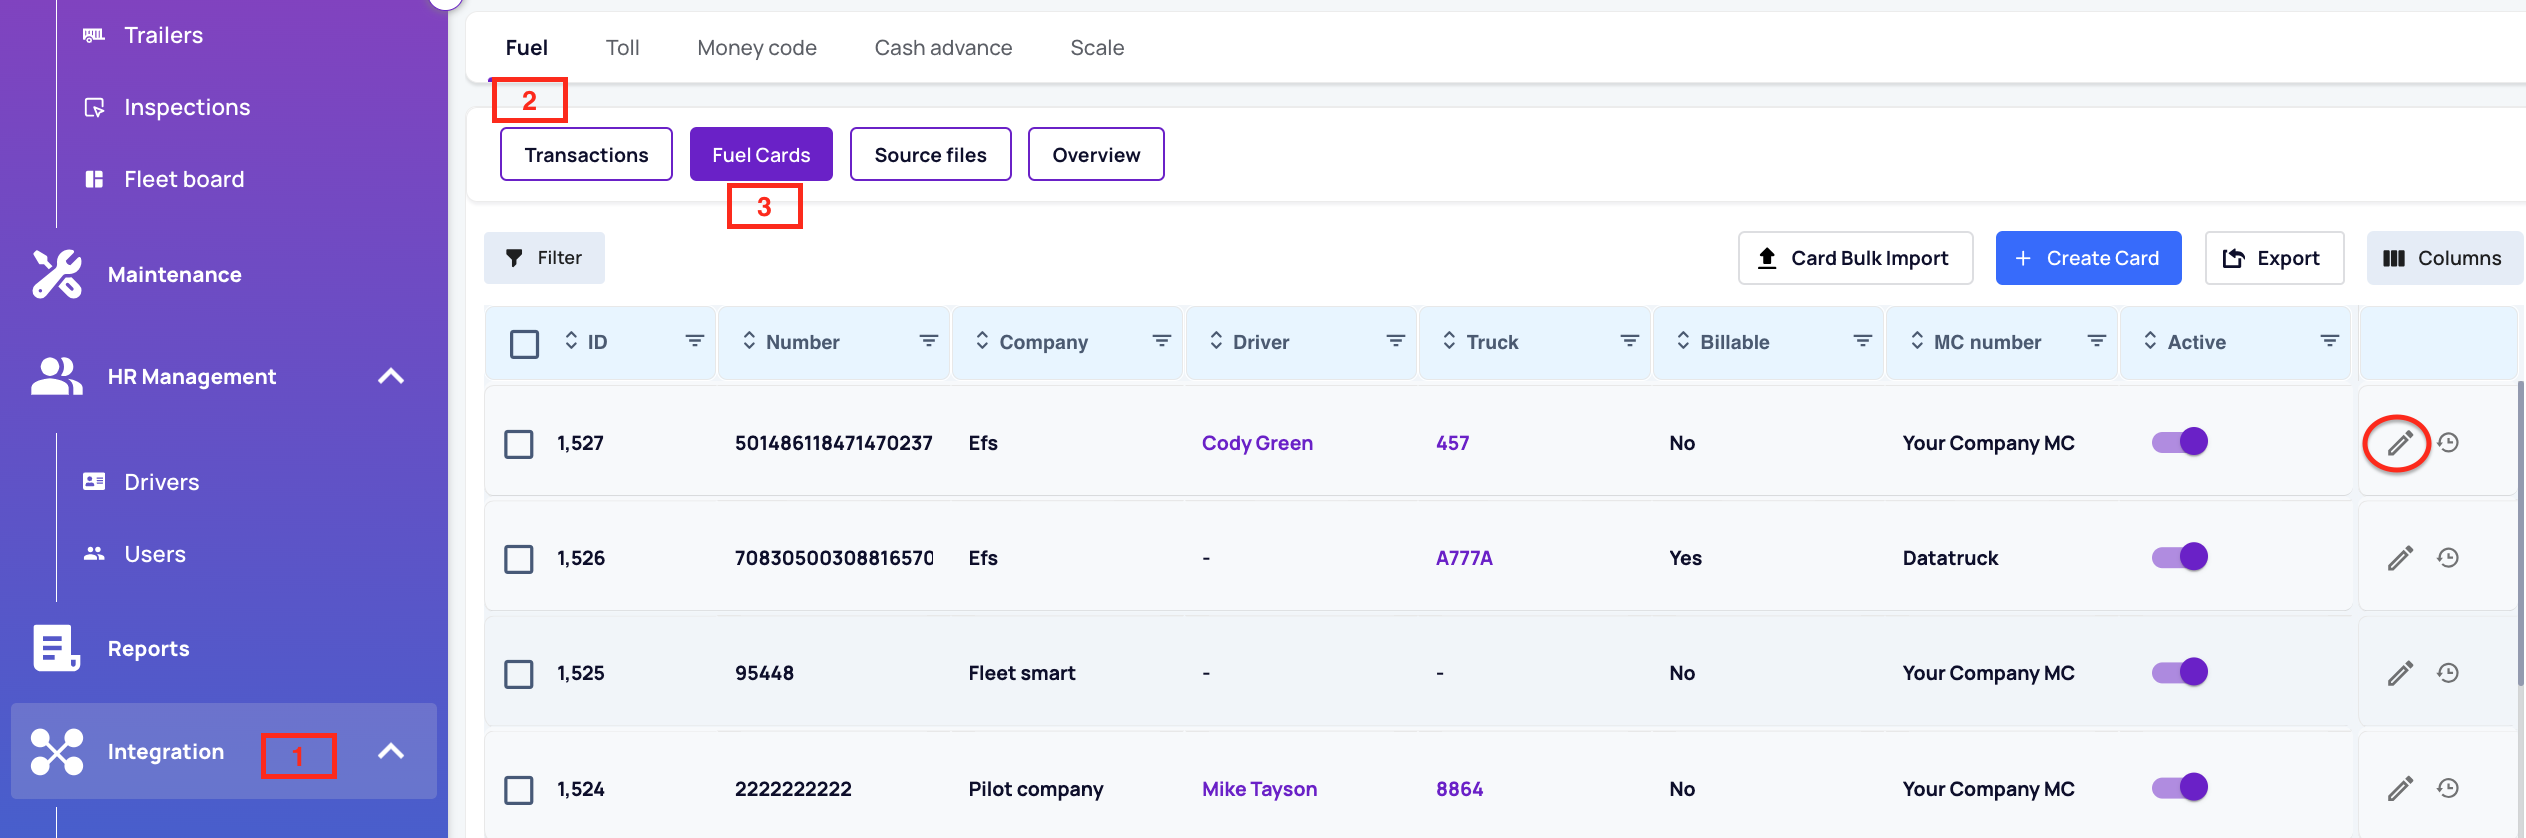
Go to: Integrations > Fuel > Fuel Cards
Assigning a Fuel Card
-
Open the Card Details
Double-click on an existing fuel card, or click the pencil/edit icon on the right side. A side-bar will open. -
Choose Who to Assign It To
Choose either a Driver or Truck to assign this fuel card. -
Make It Billable (Optional)
If you’d like to charge the driver/vendor for fuel expenses:-
Enable the Billable option.
- Choose Driver or Vendor
- From the Fuel Deduction & Show Option choose either:
-
Retail Amount - Show Retail: Charge the regular fuel price and show it.
-
Retail Amount - Plus Fees: Charge the regular price plus any extra fees and show that.
-
Invoice Amount - Show Invoice: Charge the discounted company price and show that.
-
Invoice Amount - Show Invoice and Retail: Charge the discounted price but show both the regular and discounted prices.
-
-
Check Auto-Calculate to have fuel charges automatically included in the driver’s statement.
-
-
Activate the Card
Ensure the Is Active option is checked so that the card is considered valid and in use. -
Save Changes
Click Save. When Auto-Calculate is enabled, fuel charges will automatically reflect in the assigned driver's statement.
We hope this article was helpful. However, if you have any further questions, please don't hesitate to reach out to our Live Support.

Comments
0 comments
Please sign in to leave a comment.